2016年1月26日火曜日

JQuery-UIのDialogウィジェットを使ってメッセージダイアログを表示するサンプル

JQuery-UIのDialogウィジェットを使ってメッセージダイアログを表示するサンプル

HTML+javascript
<html>
<head>
<meta http-equiv="Content-Type" content="text/html; charset=UTF-8">
<title>サンプル</title>
<link href="./jquery-ui.min.css" rel="stylesheet" type="text/css"></link>
<script src="./jquery-1.12.0.min.js" type="text/javascript" charset="utf-8"></script>
<script src="./jquery-ui.min.js" type="text/javascript" charset="utf-8"></script>
<script type="text/javascript">
<!--
$(function () {
    $("#btnOpenDialog").click(function () {
        btnOpenDialogClick();
        $("#result").text("メッセージダイアログが表示");
    });
});

function btnOpenDialogClick() {
    $("#showDialog").children("p").html("メッセージダイアログが表示されました。");
    $("#showDialog").dialog({
        title: "ダイアログサンプル",
        width: "auto",
        height: "auto",
        modal: true,
        resizable: false,
        buttons: {
            "はい": function () {
                $(this).dialog("close");
            }
        },
        open: function () {
            $(this).parents('.ui-dialog-buttonpane button:eq(0)').focus();
        }
    });
}

// -->
</script>
</head>
<body >
    <div id="main">
        <input type="button" id="btnOpenDialog" value="OPEN DIALOG" />
        <div id="result"></div>
    </div>
    <div id="showDialog" style="display:none;"><p></p></div>
</body>
</html>


とこのような感じで実現できますが、実はダイアログ表示が非同期で動作しておりJavaScriptの
btnOpenDialogClick()でダイアログ表示した後、ダイアログのClose(「はい」ボタンまたは「×」ボタンの押下を待たずに、
$("#result").text("メッセージダイアログが表示");が動作してしまう。

すこし改造して、ダイアログのClose後、処理が動作するようにする。
HTML+javascript
<html>
<head>
<meta http-equiv="Content-Type" content="text/html; charset=UTF-8">
<title>サンプル</title>
<link href="./jquery-ui.min.css" rel="stylesheet" type="text/css"></link>
<script src="./jquery-1.12.0.min.js" type="text/javascript" charset="utf-8"></script>
<script src="./jquery-ui.min.js" type="text/javascript" charset="utf-8"></script>
<script type="text/javascript">
<!--
$(function () {
    $("#btnOpenDialog").click(function () {
        btnOpenDialogClick(function (ret) {
            $("#result").text("メッセージダイアログが表示");
        });
    });
});

function btnOpenDialogClick(response) {
    $("#showDialog").children("p").html("メッセージダイアログが表示されました。");
    $("#showDialog").dialog({
        title: "ダイアログサンプル",
        width: "auto",
        height: "auto",
        modal: true,
        resizable: false,
        buttons: {
            "はい": function () {
                $(this).dialog("close");
                response();
            }
        },
        open: function () {
            $(this).parents('.ui-dialog-buttonpane button:eq(0)').focus();
        }
    });
}

// -->
</script>
</head>
<body >
    <div id="main">
        <input type="button" id="btnOpenDialog" value="OPEN DIALOG" />
        <div id="result"></div>
    </div>
    <div id="showDialog" style="display:none;"><p></p></div>
</body>
</html>


JQuery-UIのダウンロード

Query-UIのDialogウィジェットを使って問い合わせダイアログを表示

JQuery-UIのDialogウィジェットを使って問い合わせダイアログを表示するサンプル

HTML+javascript
<html>
<head>
<meta http-equiv="Content-Type" content="text/html; charset=UTF-8">
<title>サンプル</title>
<link href="./jquery-ui.min.css" rel="stylesheet" type="text/css"></link>
<script src="./jquery-1.12.0.min.js" type="text/javascript" charset="utf-8"></script>
<script src="./jquery-ui.min.js" type="text/javascript" charset="utf-8"></script>
<script type="text/javascript">
<!--
$(function () {
    $("#btnOpenDialog").click(function () {
        btnOpenDialogClick(function (ret) {
            if (ret == 0) {
                //「はい」が選択された時
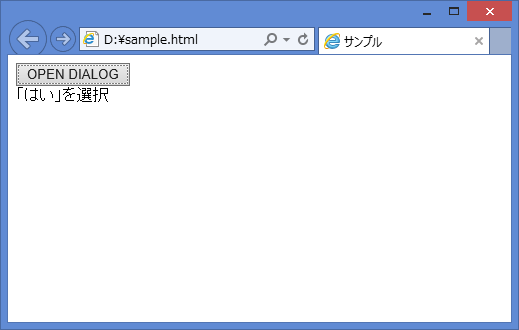
                $("#result").text("「はい」を選択");
            } else {
                //「いいえ」が選択された時
                $("#result").text("「いいえ」を選択");
            }
        });
    });
});

function btnOpenDialogClick(response) {
    var _btn = {};
    _btn["はい"] = function () { $(this).dialog("close"); response(0) };
    _btn["いいえ"] = function () { $(this).dialog("close"); response(1) };

    $("#showDialog").children("p").html("問い合わせダイアログが表示されました。");
    $("#showDialog").dialog({
        title: "ダイアログサンプル",
        width: "auto",
        height: "auto",
        modal: true,
        resizable: false,
        buttons: _btn,
        open: function () {
            $(this).parents('.ui-dialog-buttonpane button:eq(1)').focus();
        }
    });
}

// -->
</script>
</head>
<body >
    <div id="main">
        <input type="button" id="btnOpenDialog" value="OPEN DIALOG" />
        <div id="result"></div>
    </div>
    <div id="showDialog" style="display:none;"><p></p></div>
</body>
</html>


JQuery-UIのダウンロード


CSS positionで要素の配置を行う

CSS positionで要素の配置を行うサンプル

親要素に「position: relative;」を定義して、
子要素に「position: absolute;」を定義する。

section3は高さを指定しなくいても子要素がTEXTなので高さが確保されるが、
section2のような子要素が<div>などの要素になると親要素の高さは確保されないので注意(高さが可変になる場合考慮が必要)


HTML+CSS
<html>
<head>
<meta http-equiv="Content-Type" content="text/html; charset=UTF-8">
<title>サンプル</title>
<style type="text/css">
<!--
#main
{
    width: 600;
    margin: 10px auto 0px auto;
}
#section1
{
    height: 80px;
    border: 1px solid #ff0000; /* 赤 */
}
#section2
{
    position: relative;
    height: 100px;
    border: 1px solid #00ff00; /* 緑 */
}
/* section2の子要素 */
#section2_sub1
{
    position: absolute;
    top: 20px;
    left: 10px;  /* 左基準 */
    width: 100;
    height: 30px;
    background-color: #c0c0c0; /* 灰 */
}
/* section2の子要素 */
#section2_sub2
{
    position: absolute;
    top: 20px;
    left: 115px;  /* 左基準 */
    width: 100;
    height: 30px;
    background-color: #ffff00; /* 黄 */
}
/* section2の子要素 */
#section2_sub3
{
    position: absolute;
    top: 60px;
    right: 25px;  /* 右基準 */
    width: 100;
    height: 30px;
    background-color: #00ffff; /* 水色 */
}
#section3
{
    border: 1px solid #0000ff; /* 青 */
    text-align: center;
}
#section4
{
    border: 1px solid #000000; /* 黒 */
    text-align: center;
}
-->
</style>
</head>
<body >
    <div id="main">
        <div id="section1">section1</div>
        <div id="section2">
            <div>section2</div>
            <div id="section2_sub1">section2_sub1</div>
            <div id="section2_sub2">section2_sub2</div>
            <div id="section2_sub3">section2_sub3</div>
        </div>
        <div id="section3">section3</br>section3</div>
        <div id="section4">section4</div>
    </div>
</body>
</html>


2016年1月25日月曜日

Asp.net+MVC4でVIEWとContoroller間のajax通信方法2

Asp.net+MVC4でVIEWとContoroller間のajax通信方法


【環境】
.NET VB (Microsoft Visual Studio 2010(sp1) .NET Framework 4.5.2)
MVC4

非同期通信を行う
ajaxで配列を送信してContorollerにてModel Listを受け取る。

View
@ModelType .SendTestModelList

@Section javascript
<script type="text/javascript">
$(function () {
    //UPDATEボタンクリック
    $("#btnUpdate").click(function () {
        btnUpdateClick();
    });
}

//UPDATEボタンクリックイベント
function btnUpdateClick() {
    //SENDデータ
    var jsdata = [];

    var listcnt = $("listcnt").val();
    //画面一覧の値を配列に設定
    for (var i = 0; i < listcnt - 1; i++) {
        var jsdataitem = {};
        jsdataitem["id"] = $("#id_" + i).val();
        jsdataitem["name"] = $("#name_" + i).val();
        jsdataitem["item1"] = $("#item1_" + i).val();
        jsdataitem["item2"] = $("#item2_" + i).val();
        jsdata.push(jsdataitem);
    }
    //Contorollerへ送信
    $.ajax({
        type: "POST",
        url: "Sample/sendtest",
        datatype: "json",
        data: JSON.stringify(jsdata),
        contentType: 'application/json',
        success: function (data) {
            if (data == undefined) return;
            //ajax送信完了
            SendSucsess(data);
        },
        error: function (req, status, err) {
            alert("error:" + status + ",msg:" + err);
        }
    });
}
//ajax送信完了
function updateSucsess(data) {
    //ajaxからの受信処理
}
</script>
End Section

<form>
    <input type="button" id="btnUpdate" value="UPDATE"/>
    <table>
        <tr>
            <th>ID</th>
            <th>名前</th>
            <th>項目1</th>
            <th>項目2</th>
        <tr>

        <inpit type="hidden" id="listcnt" value="@Model.SendTestModelList.Count()"/>
@For i As Integer = 0 To Model.SendTestModelList.Count() - 1
        @:<tr>
            @:<td><input type="text" id="id_@i" value="@Model.SendTestModelList(i).id"></td>
            @:<td><input type="text" id="name_@i" value="@Model.SendTestModelList(i).name"></td>
            @:<td><input type="text" id="item1_@i" value="@Model.SendTestModelList(i).item1"></td>
            @:<td><input type="text" id="item2_@i" value="@Model.SendTestModelList(i).item2"></td>
        @:<tr>
Next
    </table>
</form>


Contoroller
Public Class SampleController
    Inherits System.Web.Mvc.Controller

    <HttpPost()> _
    Public Function entry(ByVal models As List(Of SendTestModel)) As ActionResult
        'Ajax通信か判定
        If Not Request.IsAjaxRequest() Then
            Return New EmptyResult()
        End If

        'modelsにSendTestModelのList型で受信


        End Function
End Class

Model
Public Class SendTestModel
    Public Property id() As String
    Public Property name() As String
    Public Property item1() As String
    Public Property item2() As String

    Public Sub New()
        id = String.Empty
        name = String.Empty
        item1 = String.Empty
        item2 = String.Empty
    End Sub
End Class

Public Class SendTestModelList
    Public Property list() As List(Of SendTestModel)

    Public Sub New()
        list = New List(Of SendTestModel)
    End Sub
End Class